How to Contribute New Data#
Want to contribute your data to DISDRODB? You’re in the right place!
Follow these five steps:
Add metadata for the station(s) you wish to contribute to the DISDRODB Metadata Archive
Add a reader function to disdrodb to ingest the station(s) raw data files
Test the DISDRODB L0 processing chain for the contributed station(s)
Upload the raw station data to an online repository (e.g., Zenodo, Figshare)
Verify that disdrodb can correctly download the contributed station data
Before you begin, decide on the <DATA_SOURCE> and <CAMPAIGN_NAME> for your stations.
These names will determine:
- the directory names for storing your stations’ raw data and metadata in the DISDRODB archive
- the name of the DISDRODB reader you will implement
Note
Guidelines for naming <DATA_SOURCE>:
* Use the institution name when the campaign spans multiple countries.
* Use the country name when all campaigns (or sensor networks) are within a single country.
* Define <DATA_SOURCE> in uppercase without spaces.
Note
Guidelines for naming <CAMPAIGN_NAME>:
* Define <CAMPAIGN_NAME> in uppercase without spaces.
* Avoid dashes (-) and dots (.) to separate words; use underscores (_) instead.
* For short-term campaigns, we suggest adding the year (e.g., EPFL_2009).
Below is a detailed list of the steps to contribute your data to DISDRODB:
Step 1: Fork and clone the DISDRODB Metadata Archive
Step 2: Install the disdrodb software in editable mode
Step 3: Define the DISDRODB Configuration File
Step 4: Add station(s) metadata to the DISDRODB Metadata Archive
Step 5: Add station(s) raw data to the DISDRODB Data Archive
Step 6: Define the
raw_data_glob_patternStep 7: Define the reader name and add a prototype reader to the disdrodb python package
Step 8: Implement the reader for your data
Step 9: Test launching the DISDRODB L0 processing
Step 10: Compress the raw text files
Step 11: Add reader testing files to the disdrodb python package
Step 12: Upload your raw data on an online data repository
Step 13: Test the raw data download
Before going down the road, please also have a look at the Contributors Guidelines.
Step 1: Fork and download the DISDRODB Metadata Archive#
Go to the DISDRODB Metadata Repository, fork the repository on your GitHub account and then clone the forked repository:
git clone https://github.com/<your_username>/DISDRODB-METADATA.git
Go inside the
DISDRODB-METADATAdirectory where you have cloned the repository:Create a new branch:
git checkout -b "add-metadata-<data_source>-<campaign_name>"
Note
The
<data_source>and<campaign_name>should correspond to the<DATA_SOURCE>and<CAMPAIGN_NAME>of the station you aim to contribute.Set the remote upstream branch:
git push --set-upstream origin "add-metadata-<data_source>-<campaign_name>"
Every time you will now
git add *andgit commit -m <describe-your-change>your changes, you will be able to push them to your forked repository with:git pushWhen you want to show your changes to the DISDRODB maintainers, you will need to open a Pull Request. To do so, go to the GitHub DISDRODB-METADATA repository, open the Pull Request and ask for a review.
For more information on GitHub Pull Requests, read the “Create a pull request documentation”.
If you struggle with this process, do not hesitate to raise an issue or ask in the DISDRODB Slack Workspace so that we can help !
Step 2: Install disdrodb in editable mode#
In order to contribute a reader to disdrodb, it is necessary that you follow the steps detailed here below to install your local version of the disdrodb python package in editable mode.
Go to the disdrodb python package repository, fork the repository on your GitHub account and then clone the forked repository:
git clone https://github.com/<your_username>/disdrodb.git
Go inside the
disdrodbdirectory where you have cloned the repositoryCreate a new branch where you will develop the reader for your data:
git checkout -b "reader-<data_source>-<campaign_name>"
Set the remote upstream branch:
git push --set-upstream origin "reader-<data_source>-<campaign_name>"
Every time you will now
git add *andgit commit -m <describe-your-change>your changes, you will be able to push them to your forked repository with:git pushWhen you want to show your changes to the DISDRODB maintainers, you will need to open a Pull Request. To do so, go to the GitHub disdrodb repository, open the Pull Request and ask for a review.
For more information on GitHub Pull Requests, read the “Create a pull request documentation”.
If you struggle with this process, do not hesitate to raise an issue or ask in the DISDRODB Slack Workspace so that we can help !
Finally, install the disdrodb python package in editable mode using:
pip install -e .
Step 3: Define the DISDRODB Configuration File#
The disdrodb software needs to know where the local DISDRODB Metadata Archive is stored on your local machine, as well as where you want to place the raw stations data as well as where to save the DISDRODB products you will generate.
The disdrodb software will look for a configuration file called .config_disdrodb.yml
in your home directory (i.e. ~/.config_disdrodb.yml).
Within the disdrodb package, we refer to the base directory of
the local DISDRODB Metadata Archive with the argument metadata_archive_dir, while
to the base directory of the local DISDRODB Data Archive with the argument data_archive_dir.
The metadata_archive_dir path corresponds to the DISDRODB directory within the DISDRODB-METADATA archive.
The data_archive_dir path corresponds to DISDRODB directory of choice where
all DISDRODB products will be saved.
To facilitate the creation of the DISDRODB Configuration File, you can adapt and run in python the following code snippet.
Please note that on Windows, these paths must end with "\DISDRODB", while on Mac/Linux they must end with "/DISDRODB".
import disdrodb

metadata_archive_dir = "<path_to>/DISDRODB-METADATA/DISDRODB"
data_archive_dir = "<path_of_choice_to_the_local_data_archive>/DISDRODB"
disdrodb.define_configs(metadata_archive_dir=metadata_archive_dir, data_archive_dir=data_archive_dir)
By running this command, the disdrodb software will write a .config_disdrodb.yml file into your home directory (i.e. ~/.config_disdrodb.yml)
that will be used as default configuration file when running the disdrodb software.
If you now close your python session and reopen a new one, if you will run the following code snippet, you
should get the metadata_archive_dir and data_archive_dir paths you just defined in the DISDRODB Configuration File:
import disdrodb

print("DISDRODB Metadata Archive Directory: ", disdrodb.get_metadata_archive_dir())
print("DISDRODB Data Archive Directory: ", disdrodb.get_data_archive_dir())
You can also print the default DISDRODB Metadata Archive and Data Archive directories by typing the following command in the terminal:
disdrodb_data_archive_directory
disdrodb_metadata_archive_directory
Step 4: Add metadata to the DISDRODB Metadata Archive#
Now let’s create the directory structure and the default metadata files for the stations you wish to contribute. If you contribute multiple stations, just rerun the following command for each station.
disdrodb_initialize_station <DATA_SOURCE> <CAMPAIGN_NAME> <STATION_NAME>
You can open the station metadata directory with:
disdrodb_open_metadata_directory <DATA_SOURCE> <CAMPAIGN_NAME> <STATION_NAME>
or manually navigate to the /<metadata_archive_dir>/DISDRODB/METADATA/<DATA_SOURCE>/<CAMPAIGN_NAME>/metadata/ directory.
The DISDRODB Metadata Data Archive has the following structure:
Now you can start filling the metadata YAML files.
The metadata YAML file contains information of the station (e.g. type of raw data, type of device, geolocation, …) which is required for the correct processing and ingestion of the station into the DISDRODB archive.
The list and description of the metadata keys is available in the Metadata section.
There are 7 metadata keys for which it is mandatory to specify the value:
the
data_sourcemust be the same as the data_source where the metadata are locatedthe
campaign_namemust be the same as the campaign_name where the metadata are locatedthe
station_namemust be the same as the name of the metadata YAML file without the .yml extensionthe
sensor_namemust be one of the implemented sensor configurations. Seedisdrodb.available_sensor_names(). If the sensor which produced your data is not within the available sensors, you first need to add the sensor configurations. For this task, read the section Add new sensor configsthe
platform_typemust be either'fixed'or'mobile'. If'mobile', the DISDRODB L0 processing accepts latitude, longitude and altitude coordinates to vary with time.the
raw_data_formatmust be either'txt'or'netcdf'.'txt'if the source data are text/ASCII files.'netcdf'if source data are netCDFs.the
raw_data_glob_patterndefines which raw data files in theDISDRODB/RAW/<DATA_SOURCE>/<CAMPAIGN_NAME>/<STATION_NAME>/datadirectory will be ingested in the DISDRODB L0 processing chain.the
readerreference tells the disdrodb software which reader function to use to correctly ingest the station’s raw data files.
Please take care of the following points when filling the metadata files:
Do not eliminate metadata keys for which no information is available !
You will define the
raw_data_glob_patternreference in the next Step 6 after having placed your raw data in the DISDRODB Data Archive.You will define the
readerreference in Step 7 along with the implementation of the readerThe station metadata YAML file must keep the name of the station (i.e.
<station_name>.yml)
When you are done with the editing of the metadata files, please run the following command to check that the metadata files are valid:
disdrodb_check_metadata_archive --raise_error=False
The only error you should temporary get is the one related to the missing value of the reader key !
Step 5: Add raw data to the DISDRODB Data Archive#
If you have completed successfully the previous step, it’s now time to place your station raw data in the local DISDRODB Data Archive.
The local DISDRODB Data Archive will have the following structure:
After having run the command disdrodb_initialize_station <DATA_SOURCE> <CAMPAIGN_NAME> <STATION_NAME> in the previous step,
the disdrodb software has already created the required directory structure in the local DISDRODB Data Archive.
To open the station’s raw data folder, either run:
disdrodb_open_product_directory RAW <DATA_SOURCE> <CAMPAIGN_NAME> <STATION_NAME>
or navigate manually to the /<data_archive_dir>//DISDRODB/RAW/<DATA_SOURCE>/<CAMPAIGN_NAME>/data/<STATION_NAME> directory.
Then copy your station’s raw data files into that directory.
You can organize them however you like, but for long-running deployments it’s best to partition the data into <year>/<month> directories.
Step 6: Define the raw_data_glob_pattern#
After placing your raw files in the DISDRODB/RAW/<DATA_SOURCE>/<CAMPAIGN_NAME>/<STATION_NAME>/data directory,
you need to fill the raw_data_glob_pattern entry in your station’s metadata YAML file.
The raw_data_glob_pattern defines which raw data files in the DISDRODB/RAW/<DATA_SOURCE>/<CAMPAIGN_NAME>/<STATION_NAME>/data directory will be ingested
in the DISDRODB L0 processing chain.
For instance, if every station raw files ends with .txt you can specify the glob pattern as *.txt.
Because you’re not including any path separators (/), this simple glob pattern will recurse through all subfolders (e.g. <year>/<month>/)
under data/ and pick up every .txt file.
If there are other .txt files in data/ that you don’t want to process (e.g. some geolocation information for mobile platforms or some auxiliary weather data),
you can narrow the match by adding the filename prefix of the file you aim to process to the glob pattern (e.g. SPECTRUM_*.txt).
Finally, to restrict the search to a particular data/ subdirectory, include that folder name in your pattern.
Specifying "<custom>/*.txt will return only files directly inside the data/<custom> directory,
while "<custom>/**/*.txt will return all files in the data/<custom> directory and all its (e.g. /<year>/<month>) subdirectories.
This last glob pattern is useful when inside the data/ directory there are various directories (e.g.weather_data, disdrometer_data, geolocation), but only
the raw files inside one of such directory (e.g. disdrometer_data) must be passed to the reader function.
You can verify the raw_data_glob_pattern has been correctly specified in the metadata YAML file, if you
are able to retrieve the list of the raw files using the find_files function:
import disdrodb

# Define your station arguments
data_source = "DATA_SOURCE"
campaign_name = "CAMPAIGN_NAME"
station_name = "STATION_NAME"

# List all files
filepaths = disdrodb.find_files(
    product="RAW",
    data_source=data_source,
    campaign_name=campaign_name,
    station_name=station_name,
)
print(filepaths)
If you succeeded, you are ready for implementing the DISDRODB reader for your raw data.
Step 7: Define the reader name and add a prototype reader to the disdrodb software#
DISDRODB readers are python functions responsible for reading raw data files and converting them into a DISDRODB-compliant object.
In the disdrodb software, the readers scripts live in the disdrodb/l0/readers directory,
organized by sensor name and data source, in order to be located at the following path: disdrodb/l0/readers/<SENSOR_NAME>/<DATA_SOURCE>/<READER_NAME>.py.
In order to guarantee consistency between DISDRODB readers, it is very important to follow a specific nomenclature for <READER_NAME>.
The guidelines for the definition of <READER_NAME> are:
The
<READER_NAME>should typically correspond to the name of the<CAMPAIGN_NAME>.The
<READER_NAME>must be defined UPPER CASE, without spaces.If for a given campaign, different type of sensors have been deployed, define the reader name as
<CAMPAIGN_NAME>_<SENSOR_NAME>. As an example, for the RELAMPAGO campaign, the readersRELAMPAGO_PARSIVEL2.pyandRELAMPAGO_RD80.pyhave been defined.If for a given campaign, different stations require different readers, define the reader name as
<CAMPAIGN_NAME>_<a_differentiating_suffix>.
The <DATA_SOURCE> directory should typically coincides with the <DATA_SOURCE> of the station.
If necessary, have a look at the existing DISDRODB readers to grasp the terminology.
Since you aim to design a new reader, you can start by copy-pasting the script
template_reader_raw_text_data.py
into the relevant disdrodb.l0.readers.<SENSOR_NAME>/<DATA_SOURCE> directory and rename it as <READER_NAME>.py.
You can open the software readers directory typing into the terminal:
disdrodb_open_readers_directory
Then enter the correct <SENSOR_NAME>/<DATA_SOURCE> directory and copy the template script.
If the <DATA_SOURCE> directory does not yet exist, create a new directory.
Note
If your raw data are netCDF files, you should instead copy the script template_reader_raw_netcdf_data.py. However, we recommend to contribute to DISDRODB the raw text files, if possible, to ensure full reproducibility.
Once the reader template has been copied and renamed in the appropriate location of the disdrodb package,
it’s time to update the metadata reader value with the reader reference.
The reader reference points the disdrodb software to the correct reader to use to process the raw data files.
The reeader reference is defined as <DATA_SOURCE>/<READER_NAME>.
For example, to use the disdrodb.l0.readers.PARSIVEL.NASA.IFLOODS.py reader
to process the data, you specify the reader reference as NASA/IFLOODS.
To check you are specifying the correct reader reference in the metadata,
adapt the following code snippet with your reader reference and sensor name and then call
the get_reader function: it should return a reader function !
import disdrodb

sensor_name = "PARSIVEL"
reader_reference = "NASA/IFLOODS"  # <READER_DATA_SOURCE>/<READER_NAME>
reader = disdrodb.get_reader(reader_reference, sensor_name=sensor_name)
print(reader)
If you updated the station metadata file correctly, your reader function for you station should also now be retrievable with the following function:
import disdrodb

campaign_name = "<CAMPAIGN_NAME>"
data_source = "<DATA_SOURCE>"
station_name = "<STATION_NAME>"
reader = disdrodb.get_station_reader(
    data_source=data_source, campaign_name=campaign_name, station_name=station_name
)
print(reader)
Once you updated your metadata YAML files, check once again the validity of the metadata by running:
disdrodb_check_metadata_archive
At this point, no error and printed message should appear !!!
If you have any question at this point, you are encountering some issues, or you just want to let the DISDRODB maintainers know that you are working on the
implementation of a reader for your data, just git add *, git commit -m <describe-your-change>, git push the code changes
made to the disdrodb software and the DISDRODB-METADATA rpeository.
Then, open a Pull Request in the GitHub disdrodb software repository and
GitHub DISDRODB-METADATA repository
so that we keep track of your work and we can help you if needed !
Step 8: Implement the reader#
Once the previous steps have been successfully completed, you are ready to implement the DISDRODB reader for your data.
However, before starting code the reader, we first highly recommend to read the DISDRODB reader structure section.
To facilitate the task of developing the reader, we provide a step-by-step tutorial which will guide you to the definition of the reader function.
Note that this step-by-step tutorial is also accessible in read-only mode in the Reader Implementation subsection of the Reader documentation.
The reader function you develop will be responsible for reading one raw data file and converting it into a DISDRODB-compliant object.
Depending on the raw data file format, the reader will produce either an L0A pandas.DataFrame or an L0B xarray.Dataset.
When it ingest a raw text file, the reader will output a DISDRODB L0A pandas.Dataframe,
while when it ingest a raw netCDF file, the reader will output a DISDRODB L0B xarray.Dataset.
When the reader function will be defined, it will be copied into the reader python file you created in the previous step Step 7 and you will be ready to test if the reader works properly and enables to process your raw data with disdrodb.
We strongly suggest to copy the reader_preparation.ipynb Jupyter Notebook from the
tutorials directory of the disdrodb package and adapt it to your own data.
However, before starting adapting the Jupyter Notebook to your own data, we recommend to first go through the tutorial with the
the sample lightweight dataset we provided for the tutorial.
If you want to run the reader_preparation.ipynb Jupyter Notebook proceed as follow:
Enter your project virtual environment or conda environment. Please, refer to the Installation for contributors section if needed.
Navigate to the
disdrodb/tutorialsdirectory.Start the Jupyter Notebook with:
jupyter notebook
This will open your default web browser with Jupyter Notebook on the main page.
Double click on the
reader_preparation.ipynb.Specify the IPython kernel on which to run the Jupyter Notebook.
To do so, first click on the top Kernel tab, then click on en Change Kernel, and then select your environment.
If the environment is not available, close the Jupyter Notebook, type the following command and relaunch the Jupyter Notebook:
python -m ipykernel install --user --name=<YOUR-ENVIRONMENT-NAME>
Now you can start the start the step-by-step tutorial and implement the reader for your data.
Note
If you arrived at this point and you didn’t open yet a Pull Request in the GitHub disdrodb repository, do it now so that the DISDRODB maintainers can review your code and help you with the final steps !
Step 9: Test launching the DISDRODB L0 processing#
To test if the reader works properly, the easiest way is to run the DISDRODB L0 processing of the stations for which you added the reader.
To run the processing of a single station, you can run:
disdrodb_run_l0_station <DATA_SOURCE> <CAMPAIGN_NAME> <STATION_NAME> [parameters]
For example, to process the data of station 10 of the EPFL_2008 campaign, you would run:
disdrodb_run_l0_station EPFL EPFL_2008 10 --force True --verbose True --parallel False
If no problems arise, try to run the processing for all stations within your campaign, with:
disdrodb_run_l0 --data_sources <DATA_SOURCE> --campaign_names <CAMPAIGN_NAME> [parameters]
For example, to process all stations of the EPFL_2008 campaign, you would run:
disdrodb_run_l0 --data_sources EPFL --campaign_names EPFL_2008 --force True --verbose True --parallel False
Note
For more details and options related to DISDRODB L0 processing, read the section Archive Processing.
The DISDRODB L0 processing saves the DISDRODB product sin the directories tree illustrated here below.
After running the DISDRODB L0 processing chain, we recommend to review the DISDRODB processing logs. You can open the logs directory typing into the terminal:
disdrodb_open_logs_directory <DATA_SOURCE> <CAMPAIGN_NAME> <STATION_NAME>
Inside the logs directory you will find two or three folders:
The
/filesdirectory contains a separate log report for each file processed under the given product.The
/summarydirectory contains a consolidated summary of all file-level logs for the station product you processed.The
/problemsdirectory only appears if some errors occurred during the processing of some files.
If the /problems folder exists, inspect its reports to diagnose the issues, update your reader accordingly, and rerun the L0 processing pipeline.
If the /problems folder is absent, your reader ran without errors and no further action is required.
Note
Sometimes errors occurs because some raw data files are empty or contains just corrupted data. In such cases, consider to remove the bad raw data file from the local DISDRODB Data Archive.
When you are satisfied of your reader capabilities, you can proceed with the last steps required to share your data with the DISDRODB community.
Step 10: Compress the raw text files#
Before sharing your data with the community, we recommend compressing your raw text files using gzip to significantly reduce their size. This method can often reduce file sizes by up to 100 times, greatly enhancing the efficiency of subsequent data uploads and user downloads. Below, we offer a utility designed to compress each raw file associated to a specific station:
from disdrodb.utils.compression import compress_station_files

campaign_name = "<CAMPAIGN_NAME>"
data_source = "<DATA_SOURCE>"
station_name = "<STATION_NAME>"
compress_station_files(
    data_source=data_source,
    campaign_name=campaign_name,
    station_name=station_name,
    method="gzip",
)
After compressing the raw files, remember to update the raw_data_glob_patterns of the station(s) metadata to account for the new file extension (i.e. .gz).
For example, if the original raw data files had the extension .txt, you should change the raw_data_glob_pattern to *.txt.gz.
Before proceeding, rerun the DISDRODB L0 processing once again to check that everything works fine.
Note
If you arrived at this point and you didn’t open yet a Pull Request in the GitHub disdrodb repository, do it now so that the DISDRODB maintainers can review your code and help you with the final steps !
Step 11: Add reader testing files to the disdrodb python package#
If you arrived at this final step, it means that your reader is ready to be shared with the community.
If you aim to ensure that the disdrodb software will be able to process your data also in the future, you can optionally add to the software a very small data sample composed of two raw data files.
This contribution enable our Continuous Integration (CI) testing routine to continuously check that the reader you implemented will provide the expected results also when someone else will add changes to the disdrodb software codebase or some of the package dependencies will evolve in the future.
Note
The objective is to run every reader sequentially. Therefore, make sure to provide a very small test sample (a few KB in size) in order to limit the computing time.
The size of the test samples must just be sufficient to guarantee the detection of errors due to code changes. The test samples are typically composed by two files and a couple of timesteps with measurements.
You should place you data and config files under the disdrodb/tests/data/check_readers/ directory tree:
The /data directory must contain your raw data files, while the /ground_truth directory must contain the corresponding ground truth files.
If the raw data are text files, the ground truth files must be Apache Parquet (DISDRODB L0A) files generated by the DISDRODB L0 processing of the raw data.
If the raw data are netCDF files, the ground truth files must be netCDF (DISDRODB L0B) files generated by the DISDRODB L0 processing of the raw data.
If you arrived at this point and you didn’t open yet a Pull Request in the GitHub disdrodb repository and in the GitHub DISDRODB Metadata Repository, do it now so that the DISDRODB maintainers can review your code and help you with the final steps !
Note
To open a Pull Request in the GitHub DISDRODB Metadata Repository,
you need to git push the changes of your local DISDRODB-METADATA directory.
Note
To open a Pull Request in the GitHub disdrodb repository, you need to git push the changes
of your local disdrodb python package directory.
Step 12: Upload your raw data on Zenodo#
We provide users with a code to easily upload their stations raw data to Zenodo.
If you aim to upload the data of a single station, run:
disdrodb_upload_station <DATA SOURCE> <CAMPAIGN_NAME> <STATION_NAME> --platform zenodo.sandbox --force False
If --platform zenodo.sandbox is specified, you are actually uploading the data in the
Zenodo Sandbox.
It’s good practice to first upload the station there, to check that everything works fine (see Step 13 below),
and then upload the data in the production environment using --platform zenodo
In order to upload the data to Zenodo, you need to specify the Zenodo tokens into the DISDRODB configuration file with:
import disdrodb

disdrodb.define_configs(zenodo_token="<your zenodo token>", zenodo_sandbox_token="<your zenodo sandbox token>")
To generate the tokens, for Zenodo go here, while for
Zenodo Sandbox go here. When generating the tokens,
you can choose the name you want (i.e. DISDRODB), but you need to select the deposit:actions and deposit:write scopes.
When the token is generated, you will see something similar to the following:

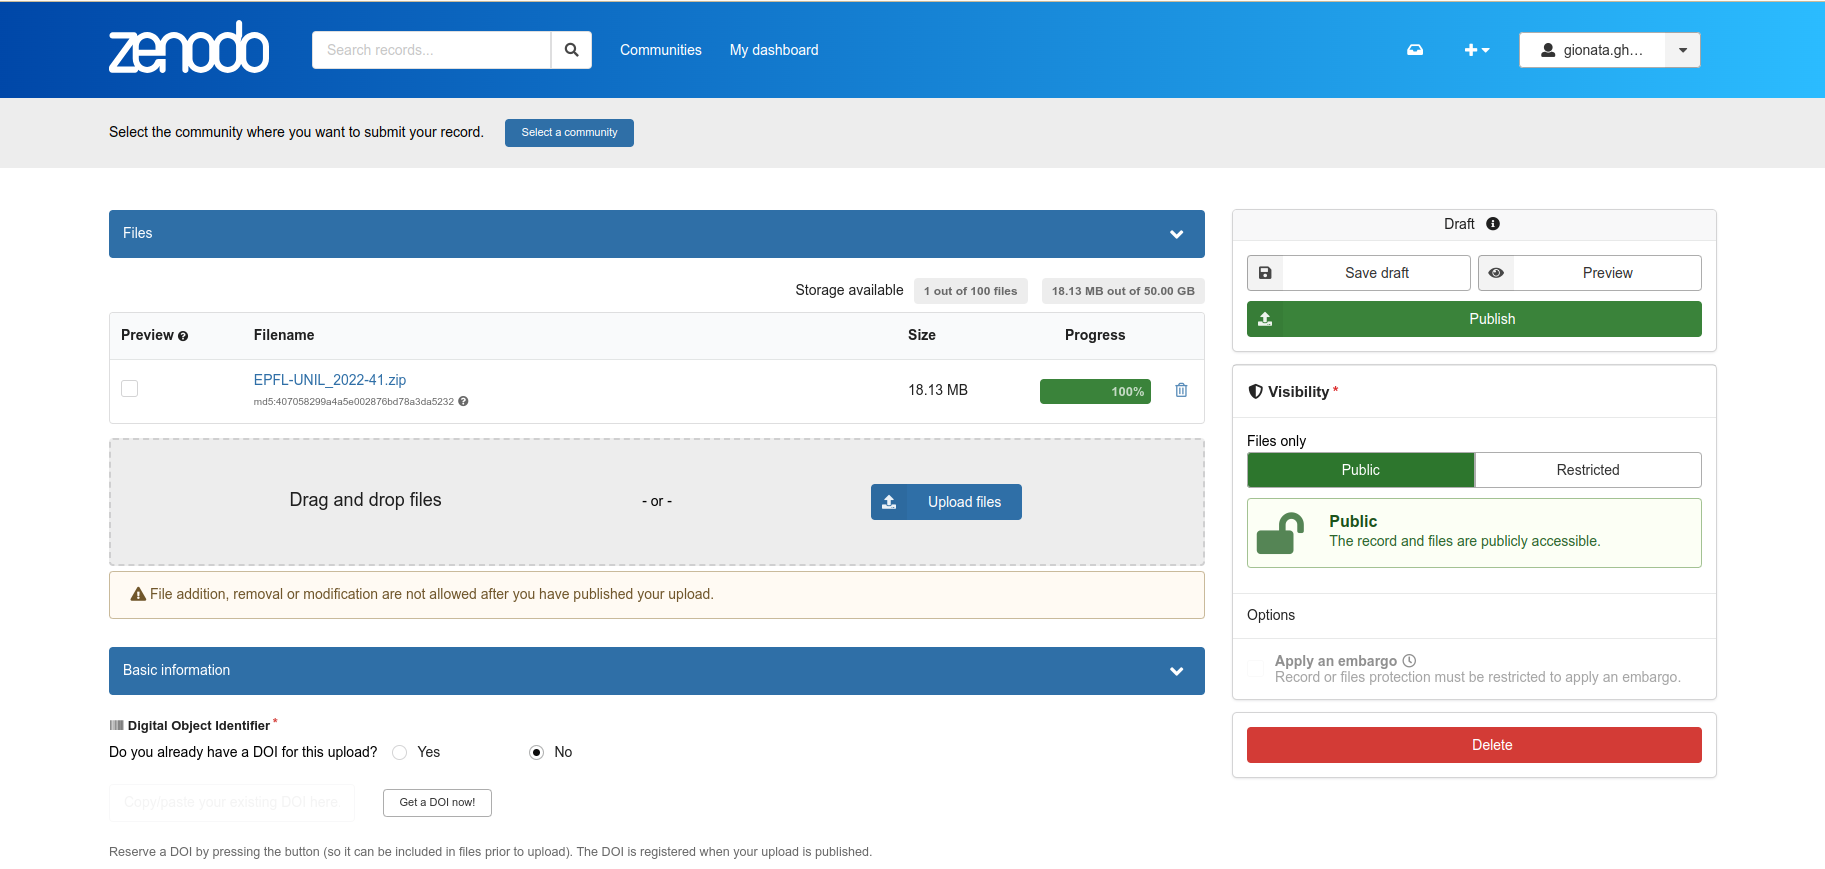
When the command disdrodb_upload_station is executed, the data are automatically uploaded on Zenodo.
A link will be displayed that the user must use to go to the Zenodo web interface to manually publish the data.
Please select the community DISDRODB (see top blue button) before publishing the data !
If you are uploading multiple stations, you can have an overview of the data still waiting for publication at:
Note that:
when the data are uploaded on Zenodo, the metadata key
disdrodb_data_urlof the station is automatically updated with the Zenodo URL where the station data are stored (and can be downloaded once the data have been published)if the
authors,authors_urlandinstitutionDISDRODB metadata keys are correctly specified (i.e. each author information is comma-separated), these keys values are automatically added to the Zenodo metadata required for the publication of the data.if the station data is not yet published on Zenodo, the data can still already be downloaded (i.e. for testing purposes).
If you feel safe about your data and the whole procedure, you can also use the command below to upload all stations of a given campaign.
disdrodb_upload_archive --data_sources <DATA SOURCE> --campaign_name> <CAMPAIGN_NAME> --platform zenodo.sandbox --force False
Consider that if you previously uploaded data on Zenodo Sandbox for testing purposes, you need to specify --force True
when uploading data to the official Zenodo repository !
Note
If you wish to upload the data in another remote data repository, you are free to do so. However, you will have
to manually upload the data and manually add the correct disdrodb_data_url to the station metadata files.
Moreover, you must take care of compressing all stations data into a single zip file before uploading it into your remote data repository of choice !
Note
Please consider to compress (i.e. with gzip) each raw file to reduce the file size ! See Step 10.
Step 13: Test the raw data download#
To test that the data upload has been successful, you can try to download the data and run the DISDRODB L0 processing.
However you MUST NOT perform this test using the DISDRODB Data Archive directory you were working till now because you would risk to
overwrite/delete the data you just uploaded on Zenodo.
Instead, you MUST TEST this procedure using a different directory (e.g. /tmp/DISDRODB) where you will download the data.
We strongly suggest to test this procedure by first uploading and publishing data on the Zenodo Sandbox repository.
We provide this python script that should enable you to test safely the whole procedure.
import disdrodb
from disdrodb.api.create_directories import create_test_archive

test_data_archive_dir = "/tmp/DISDRODB"
data_source = "<your_data_source>"
campaign_name = "<your_campaign>"
station_name = "<your_station_name>"


# Create test DISDRODB Data Archive where to download the data
test_data_archive_dir = create_test_archive(
    test_data_archive_dir=test_data_archive_dir,
    data_source=data_source,
    campaign_name=campaign_name,
    station_name=station_name,
    force=True,
)

# Download the data (you just uploaded on Zenodo)
disdrodb.download_station(
    data_archive_dir=test_data_archive_dir,
    data_source=data_source,
    campaign_name=campaign_name,
    station_name=station_name,
    force=True,
)

# Test that the DISDRODB L0 processing works
# - Start with a small sample and check it works
disdrodb.run_l0_station(
    data_archive_dir=test_data_archive_dir,
    data_source=data_source,
    campaign_name=campaign_name,
    station_name=station_name,
    debugging_mode=True,
    verbose=True,
    parallel=False,
)

# Now run over all data
# - If parallel=True, you can visualize progress at http://localhost:8787/status
disdrodb.run_l0_station(
    data_archive_dir=test_data_archive_dir,
    data_source=data_source,
    campaign_name=campaign_name,
    station_name=station_name,
    debugging_mode=False,
    verbose=False,
    parallel=True,
)
When the script finishes, check that the content in the test_data_archive_dir directory is what you expected to be.
If everything looks as expected … congratulations, you made it !!!
Your Pull Requests will be merged as soon as a DISDRODB maintainer can check your work, and the data and reader will be available to the DISDRODB community.